Tools and Equipment
What you need to make Mokume Gane
“Torque” by John Marshall. Sterling silver and copper. Photo: Jerry Davis.
“Mokume gane allows me to express myself with form and to make a two dimensional statement within the form in much the same way I do with drawing…it is the ultimate one-of-a-kind statement because the steps that are taken to develop the pattern cannot be duplicated.”
Basic tools for Mokume Gane
“Hanging Vessel” by John Podlipec. Copper and brass with silver.
You will need some basic tools to create mokume by the processes outlined in this book. Many of them are common to each approach. Specialty items specific to one method or another, such as my mini-fusing kiln, will be described in the chapters dealing with those methods. If you are in a metal-working trade, you probably already have most of these tools, or they can be purchased locally. If you don’t have a tool listed or can’t afford it, do not despair; there are few problems which creative thinking cannot solve! Below are groups of tools used for making mokume.
The first equipment you will need for preparing a mokume billet will be metal cleaning supplies. These include clean water, unscented dishwashing liquid, ScotchBrite pads, pumice and clean, lint-free drying towels. Different craftsmen use slightly different cleaning equipment but all agree on the absolute necessity of having completely clean metal.
You will need some sort of kiln or forge in which to fire the mokume billets. If you are using a solder bonding method, the kiln will essentially be replaced by a torch.
Quality torches and soldering equipment are essential. You’ll use these not only for the solder bonding methods outlined in this book, but also for soldering the edges of billets prior to rolling. You will also use them as the kiln burners for firing mokume in the mini kiln. I think oxygen/propane is the best.
By the way, if you don’t have a mini-torch (Smith Little Torch), I highly recommend them. A friend gave me one years ago and now I can’t imagine how I got along without it. If you’re still in the dark ages using an acetylene plumber’s torch, do yourself a favor and spend a hundred bucks on this tool. The other soldering stuff you’ll need is all standard. If you’re in the jewelry business, you’ve already got it.
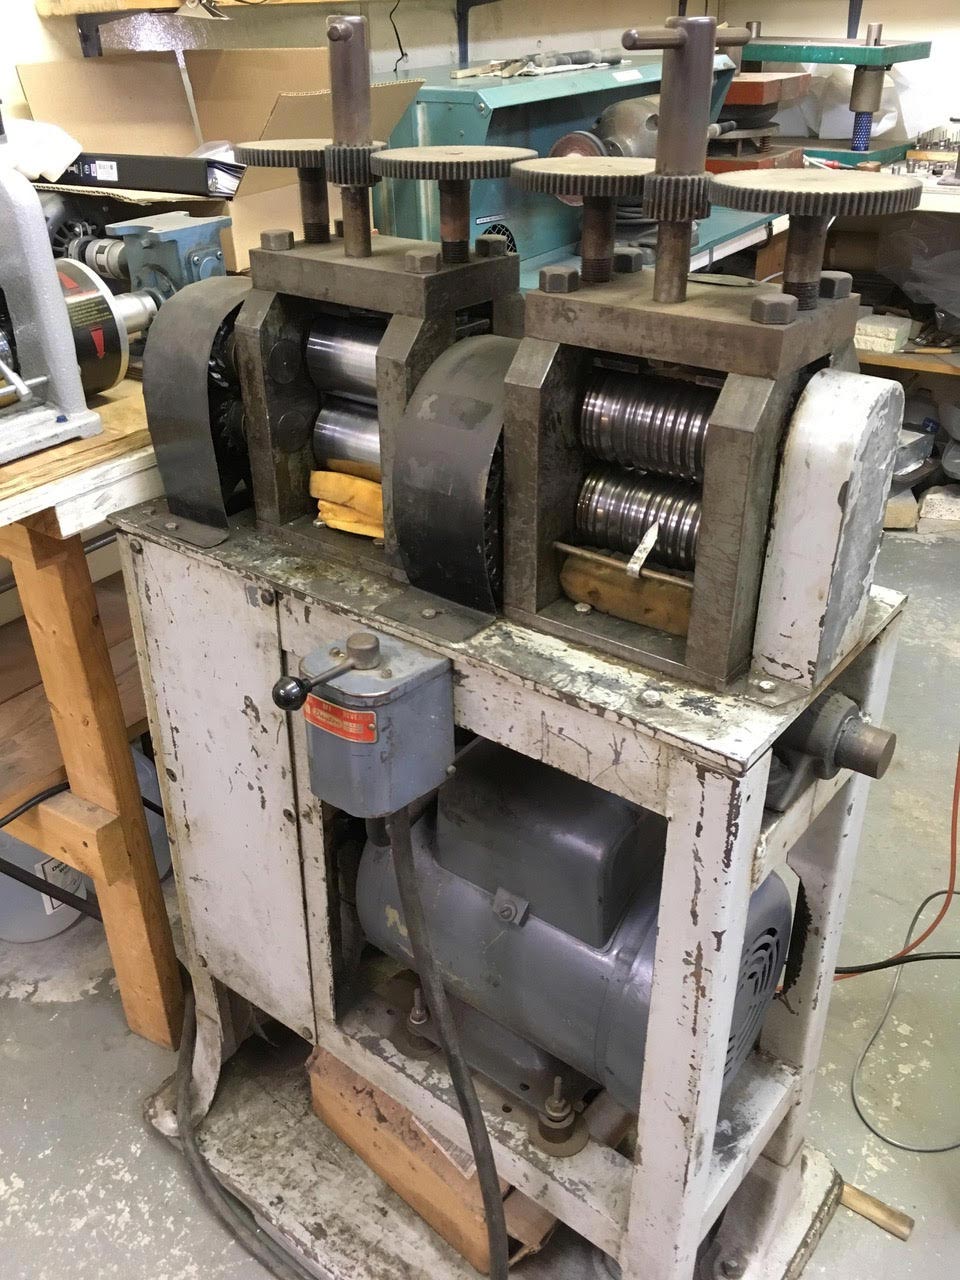
Rolling Mill with foam rubber oilers for protecting the rollers.
Forging requires a solid anvil and a few hammers. I like an anvil that weighs at least 100 pounds, with a smooth, flat, but not necessarily polished surface. I do my heavy forging with a 3-pound cross-peen hammer, forge gouge-patterned metal flat with a slightly domed planishing hammer, and use a polished chasing hammer for finer sheet and wire forging. If you have a hydraulic forming press, you can use this for forging small pieces of mokume. I like press-forging, because it very gently and evenly compresses the metal, minimizing internal stress.
Probably the most expensive item that you need for jewelry applications is a rolling mill. For years I used a small, cheap mill and it worked fine. I then moved on to a more precision-quality hand mill like the one pictured here, and now use a dual-roller power mill with custom ground rollers. Again, my rule of thumb is to use what you can afford. If you’re a blacksmith or making larger-than-jewelry-scale pieces you may be able to get by without a rolling mill. If you have access to a power hammer, like the one used below by Bob Coogan, you can quickly hot forge most billets to a workable thickness. And you can, of course, make sheet the old-fashioned way, with a hammer and anvil.
Some factors to consider that make a rolling mill good for mokume are the following:
1. Quality machining and steel…
You don’t want a lot of "slop" in the gears and bearings. Rollers need to stay exactly where you set them and to move in unison when you turn the handle. The better quality your mill is, the better sheet it will produce.
2. Maximum sheet thickness.
It’s nice to have a mill with a large maximum sheet thickness. Most range from 3 to 6 mm, with some up to 8 or down to as little as 2 1/2. You can compensate for small, maximum sheet thickness by using thinner stock in your billets, and forging them by hand before rolling. However, if you are going out shopping for a mill, get one that can handle at least a 6mm billet.
Photo: TTU Photo Services.
3. Clean, smooth rollers.
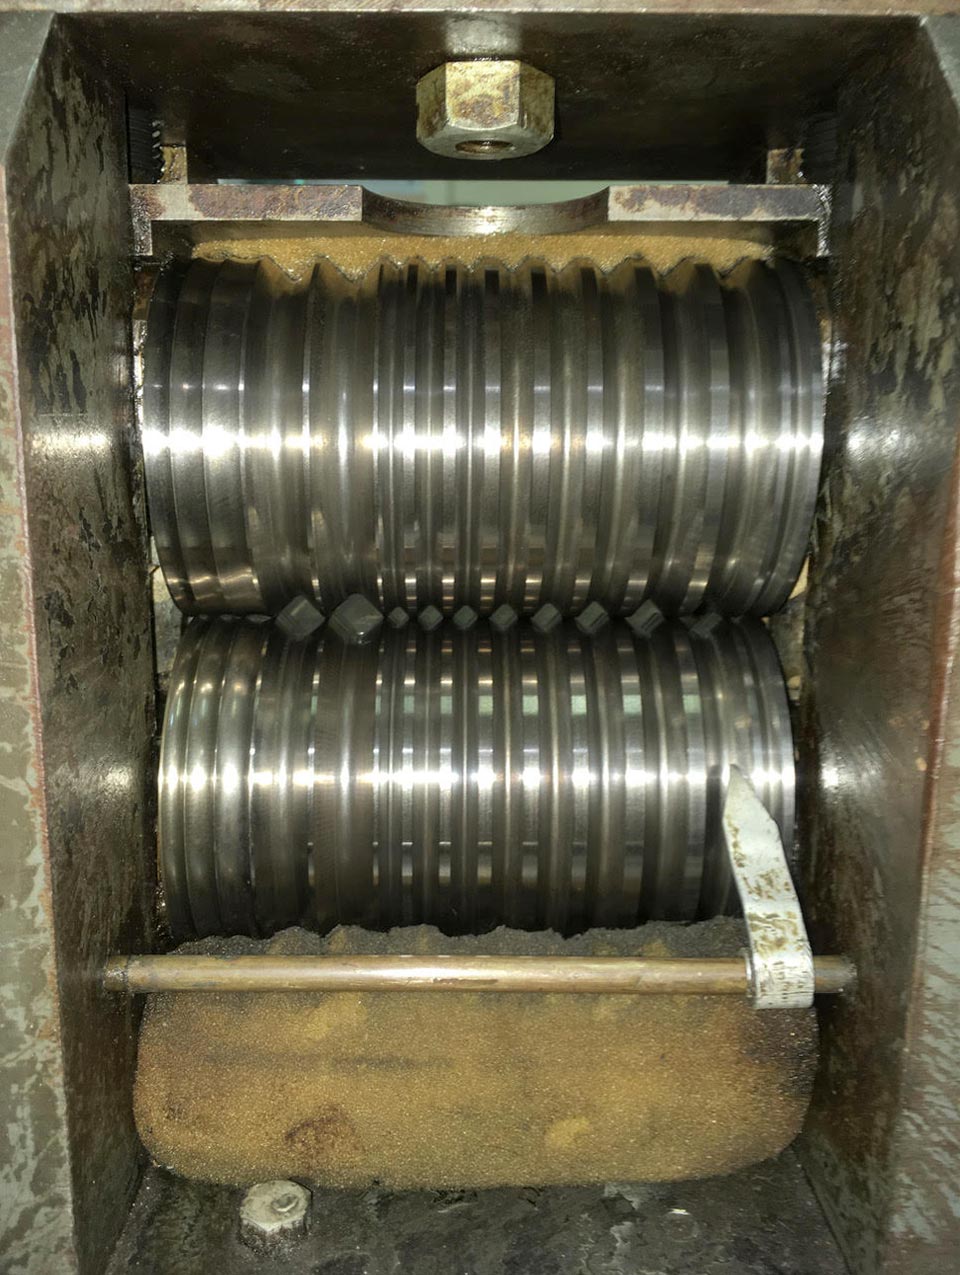
If you have not made foam rubber oilers for your mill, look at the ones in the photo at the top of this page.
They are made by roughly cutting the foam to an oversized shape of the space they need to fill. Cut them so they will "lock" in place around the rollers but don’t worry about cutting individual grooves for your square wire roller. If properly sized, the foam will conform to the contour of the roller. Put a few drops of light, non-gumming machine oil on them, thinned with a little W-D 40, and they will clean and oil your rollers as you work. Remember, though, that a little of this oil will stick to your metal when you roll it and will need to be washed off.
4. Gear reduction.
Don’t forget the advantages of gear reduction for a hand-mill. Mokume can require a lot of mill work, and reduction gears make it much easier.
Tools for Patterning and Finish Work
For patterning, you need a pitch bowl, a basic variety of punches, and a chasing hammer. Also, you will need assorted cutting burs for use with your flexible shaft machine. I like large 90- and 45-degree bearing-burs as well as ball-burs, inverted cones, and cylinder-burs.
For traditional patterning, it’s easy to make a bull nose chisel (description Chapter VII, part 2: Forge Fired Mokume Gane) and these can remove a lot of material fairly quickly.
Several of the artists (including myself) whose work is shown in this book, also use vertical milling machines to cut patterns in their metal. It is relatively quick and easy, but unless you already have one, it’s not the kind of thing you just run out and buy.
Finish work requires the usual files, sanding, and grinding equipment. I have some personal favorites in this category. The first is a water-cooled lapidary machine made for cutting cabochons. For finer grinding, I use a lot of abrasive separating discs with my flex shaft, and also those nifty little snap-on sanding discs. My basic rule of thumb? Use what you’re comfortable with, and what you can afford.
NEW LAYERS — WHAT WE’VE LEARNED SINCE
Tool Talk
Mokume is by any estimation a tool-intensive craft. Over the years I have found a number of tools that have made a huge difference in the quality of my mokume and the efficiency with which it is made. There are lots of ways to inexpensively make small amounts of laminated materials, but if you hope to make a lot of it, or large pieces of it, you may want to consider some more production oriented equipment. Number one on my list is my old 3x5-inch dual power rolling mill. I bought this from a jewelry repair shop, that was going out of business, for $500 and then put another $1000 into it to change the gear system and regrind the rollers. I simply could not have done the work I’ve done without it. Aside from how it effortlessly rolls sheet or rod, I love the radiused corners of the square wire rollers. Having the corners of a mokume rod rounded rather than sharp or beveled reduces stress on the metal when twisting.
Rebuilt with helical gears on the flat side to enable rolling up to 12mm in thickness and custom ground wire rolls.
Custom-ground square wire rollers that will handle 1/2 inch billets and on the left side, domed comfort fit wire rollers. Note the foam rubber oilers that have kept these rolls looking perfect for over 20 years!
My Bull power hammer. It hits hard, but is beautifully controllable.
For reducing the thickness of large billets, nothing beats a power hammer, and I love mine. There is a direct relationship between the size of a billet and the hammer you will need to forge it. The hammer must be large enough so the energy from each blow penetrates all the way into the the billet. If you use too small of a hammer on a large billet, the energy will be absorbed by the top few layers. These will compress and expand, but the middle layers won’t really move; this differential expansion causes unnecessary stress on the layers of a billet and can result in delamination. You can also end up having to trim away more material from the perimeter of the billet because it mushrooms over so much. Generally speaking, you will find using a small hammer on a large billet a less-than-satisfying experience.
Forging with a hydraulic press is becoming quite common as more and more metalsmiths have access to them. Whether the press forging is done hot or cold, the problem associated with it is pretty much the opposite of using a too small of a hammer. Hydraulic presses tend to have so much pressure that the billet will “barrel.” The flat plattens tend to hold the top layers because of the enormous friction where they meet and all that energy is focused on the middle layers of the billet. Hot-forging on a slow-moving hydraulic press exacerbates this tendency because the press plattens will quickly suck the heat out of the outer layers and “freeze” them in place. The middle layers will then extrude out of the center of the billet (peanut-butter-cracker style) and the bonds of the layers along the extruded edges can split. To minimize this when I cold-forge with a hydraulic press, I use polished plattens on either side of the billet and apply a light coat of lard to the billet to reduce the friction and allow those outer layers to move more easily. When hot-forging, applying a good layer of flux or using a glass-forging compound can help. On the relatively new, faster-moving hydraulic forging-presses this issue is less of a problem because the area of contact with the dies is smaller and of shorter duration. A pneumatic power-hammer is even better when used by a skilled smith. No matter what kind of equipment you use, watch edges of the billet as you forge to determine if you’re using an appropriate amount of force to move the metal gently and efficiently.
This 200-ton Enerpac press has its own dedicated room. Essential shielding plexiglass has been removed for the photo.
Tools for patterning come in all different sizes. I love carbide burs of various shapes for small-scale gouge-patterning. If you’re patterning a large piece of mokume a die-grinder with a carbide bur will remove a lot of metal very quickly. They will cut through skin and bone even faster, so please be careful and learn how to handle one safely before trying. Patterns may also be pressed into a thick piece of mokume gane with dies. It’s like punch-patterning in one fell swoop. After pressing, the embossed surface is then milled or ground flat to reveal the pattern.
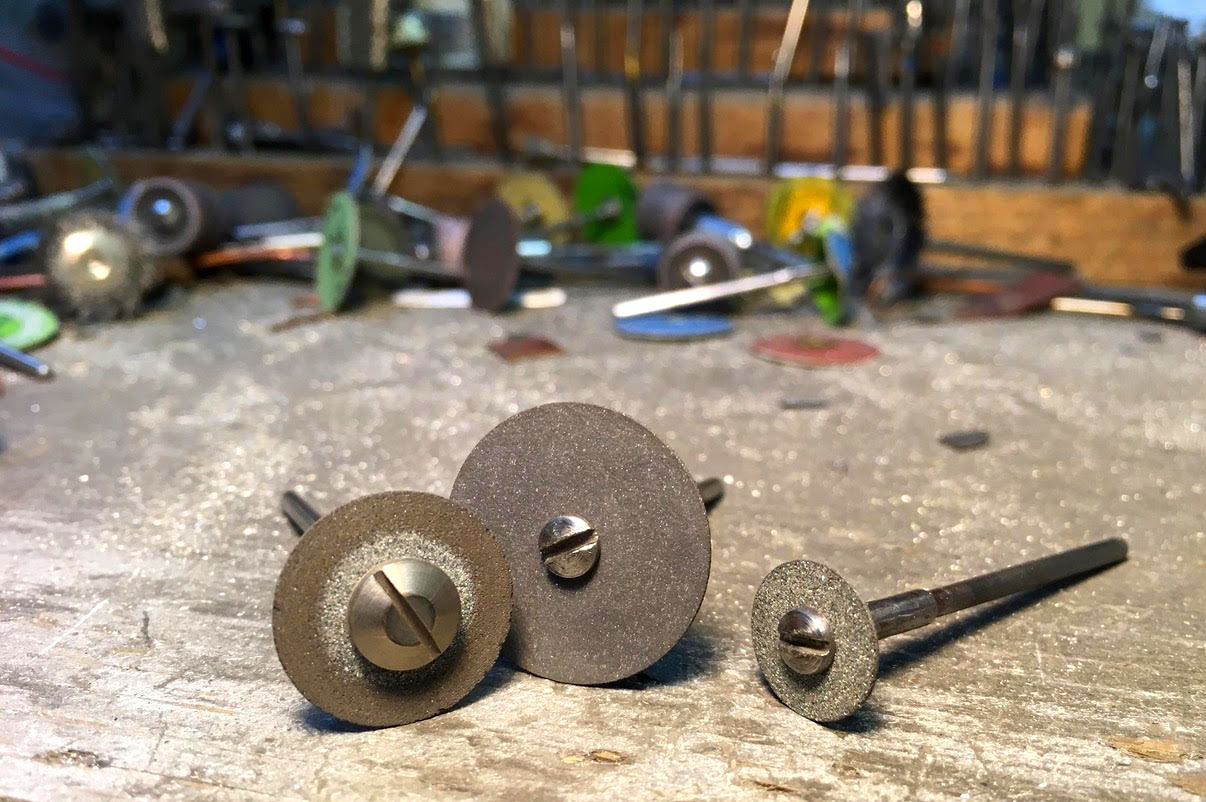
One of my faves, I couldn’t work without separating discs!
One of the tools that I personally use all the time and love are separating discs with a flex shaft. I use them for cutting, grinding, sanding and everything in between. I find them particularly helpful when enhancing or refining the pattern on a piece of mokume. It is relatively fast and with a little practice can cut quite smoothly. Because it grinds so smoothly, it is easy to see the pattern emerge in real time. Oftentimes burs will smear the metal as it cuts and it’s hard to see the affect on what you’re cutting. For me, the lowly separating disc is a treasured tool.
Do YOU love a certain tool for your mokume work? Please share it in the comments section below!
— Steve
FROM THE BOOK’S GALLERY
©2000-2019 STEVEN JACOB INC. All rights reserved. Copyrighted materials – no portion to be reproduced without written permission from STEVEN JACOB INC.


