From Billet to Sheet
Transforming a Mokume Billet into Usable Material

Mokume gane cups by Alistair McCallum. Silver, copper and gilding metal.
“There is a tendency amongst some practitioners of mokume gane to become obsessed with the process and lose sight of the finished piece. The relationship of the pattern to the form has always been more important to me than the technique itself.”
Tips for the maker

When you take a newly-fired mokume billet out of the pickle, examine it closely and note any areas that appear over- or under-fired. Write them down in a log book along with anything else significant about the firing. Include alloys, metal thickness, weight, stacking order, kiln temperature, color judgment, and length of firing. Keeping a log of your firing experiences is extremely important. If you work with a lot of different alloys, it is impossible to keep all the information in your head, so, as my mother used to say “Get it in writing.” You may begin doing this by using the Firing Log form [linked here as a pdf file] and make your own notebook just for this purpose.
The first thing to do with the rough billet is to gently forge it. You should reduce the thickness by about 15% of its original size. This helps to reduce the size of the internal grain structure and will make rolling out the billet much easier. Next, trim the edges. You must trim it back all the way to clean metal, sawing, filing or grinding away any imperfections such as pits or an undersized sheet. Any thin lines between layers, whether light or dark-colored, indicates an incomplete bond and should be ground back to 100% clean, solid, metal. Use a 10x loupe to make sure you have cut away all signs of an imperfect bond. When grinding away a gold billet, you begin to realize how important accuracy is when cutting and stacking the metal. Some loss is to be expected but careful attention to cutting, stacking, and firing procedures can keep this to a minimum.
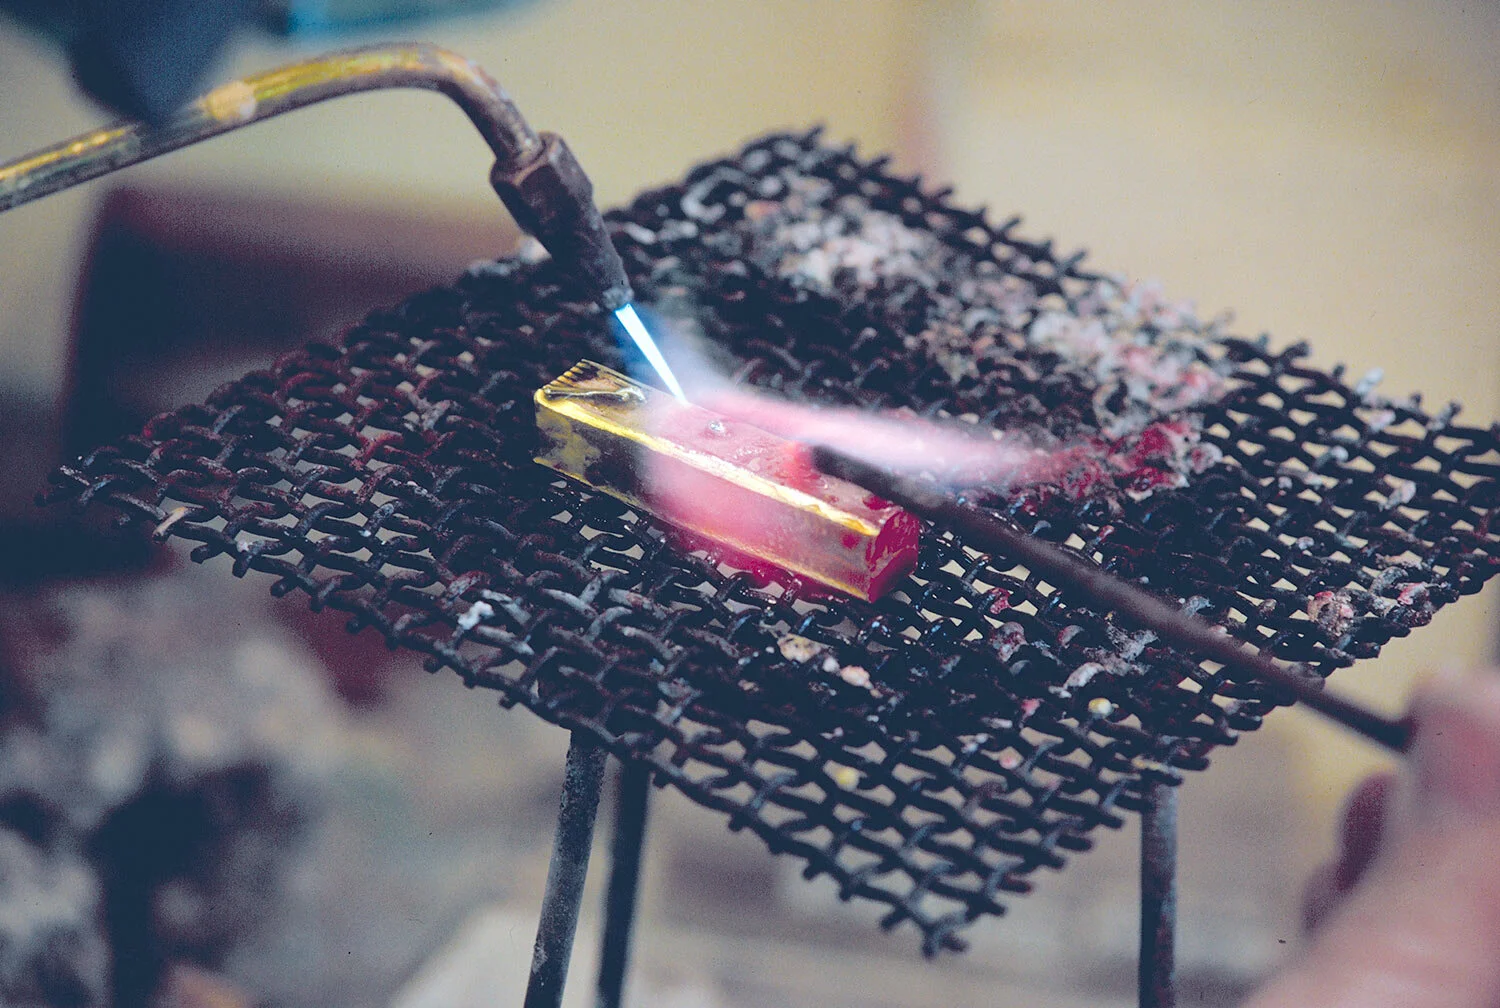
Now it is time to solder the edges of the billet. Flux the entire billet generously with paste flux. To get a good build-up of paste flux on the billet, I like to alternately warm the piece with a torch and then use cross-lock tweezers to dip it into a container of flux. Continue doing this until the entire piece is crusted over with a heavy layer of dried flux. I have also used high-temperature “Black Flux” made by Englehard, with good success. I use the hardest solder possible and apply it very carefully, using a solder pick to spread it over the edges of the billet rather than excess heat to make it flow. (I also recommend using silver solder for billets which contain silver, and gold solder for gold billets.
Even though all of this solder will eventually be removed, if any delamination occurs while manipulating the billet, it can easily be repaired by fluxing and reflowing the solder into the offending crevice. If done properly, using the right solder, no sign of the repair will be evident.) If the flux breaks down before you get all four sides soldered, you will have to pickle, clean, and solder again. (Or as James Binnion suggests, keep some powdered borax handy and sprinkle it on the billet as you solder if the flux begins to burn off.)
If you’re working with all copper alloys in a billet, you may want to skip soldering the edges. Because these alloys are so similar, much less stress builds up between the layers and they are less prone to crack or delaminate. You’ll probably lose a little extra material when you finally trim the edges, but with copper alloys this is inconsequential. After soldering, you should forge the billet again. With billets containing layers of copper alloys only, this may be done at red (not orange) heat. Billets with high silver-content alloys should be allowed to cool to black heat before forging. All of these metals may also be forged cold, which is much safer although slower. Always forge billets containing platinum cold. This forging achieves the same end as does the forging of an ingot, that is, compressing and aligning the crystal structure of the metals in the laminate. After reducing the thickness by around 15-20%, planish smooth and begin rolling. Note: It’s very easy to forge the edges of the billet thinner than the middle, so when you begin rolling, if you see that only the center section of the billet is contacting the rollers, stop and forge the center more. To continue rolling at this point puts a lot of stress on the mokume and can cause edge cracks, delamination and splitting.

For rolling, use the same procedure as outlined earlier for rolling ingots, i.e.,
1. Reduce thickness in gradual increments.
2. Keep the sheet as flat as possible.
3. Reduce the thickness of the billet by only a third, not half, before annealing.
If any delamination appears on the ends or edges of the sheet, then clean, flux, and reheat to flow the solder into the seam(s). Apply pressure to the separated seam to close it as tightly as possible while the solder is molten. You should be very careful not to allow pickling solution to become trapped between layers. If you suspect this has happened, boil or clean in an ultrasonic cleaner with a diluted bicarbonate of soda solution. Then rinse thoroughly before resoldering.
When blisters or bubbles occur in an isolated area of the sheet, it sometimes may be repaired by the method outlined below:
Drill a small hole in the top center of the bubble and clean thoroughly in an ultrasonic cleaner, with a steamer, or by boiling. Put liquid flux down the hole (warming the sheet slightly will help it go in), then bring the whole sheet carefully up to bonding temperature. Have a steel probe ready and as the metal reaches the eutectic point of the metals in the billet, focus a soft flame on the blister and push the blister back down flat. Flux and gas should escape out the hole and then you should see the shimmer of sweating metal. Remove the torch, cool and pickle. Re-examine. You may also perform the same procedure using hard solder to repair the blister, though re-fusion is the superior, albeit trickier, method.
If you have cracking on the edges of the sheet that do not respond to refilling with solder, trim back the edges to cut away all of the imperfections. When working with expensive alloys, it is always painful to cut away large sections of your sheet because of cracks, but these are weak places that will only encourage more cracking. If you leave these cracks or fill them with solder you will probably end up losing even more, not to mention the time spent on a very frustrating endeavor.

After you have reduced the thickness by a third, and annealed the billet, continue with the same procedure. There is a point in this process where the mokume will stop acting like a billet with separate layers all fighting against each other and begin acting like one sheet of metal. You’ll know it when you get there, and you’ll have no more problems.
You will probably have a specific purpose in mind for at least some of the mokume sheet. If you’ve made extra, go ahead and cut off that extra now and save it in its thicker state. This will allow you more flexibility in rolling to the size and shape you need in the future. When you know what thickness you need for a certain project, continue to roll the piece down to the shape and thickness you desire.
NEW LAYERS — WHAT WE’VE LEARNED SINCE
New information about billet preparation will appear here soon.
FROM THE BOOK’S GALLERY


©2000-2020 STEVEN JACOB INC. All rights reserved. Copyrighted materials – no portion to be reproduced without written permission from STEVEN JACOB INC.